By: Loretta Sebastiani

Santa Claus home
To build Santa Claus home you need a few simple things and ... your children!
Building Santa's home is easier than it may seem. You need: paper, cardboard, polystyrene, a new material derived from corn that sticks without glue! Most of it is recyclable, that's good for the environment. Your children will play with you, develop creativity and imagination, and spent Christmas holidays, will be able to use this house as the setting for other games.

You will need
- - 2 cardboard boxes (I used boxes that contained 6 bottles of wine)
- - 8 white Bristol board corrugated paper A4 500g
- - Green sticky paper
- - Brown sticky paper for the roof and the frame of the paintings
- - Images with penguins and igloos
- - 2 little pine-trees
- - Some colored polystyrene beads
- - A cinnamon stick
- - 1 package of HappyMais or any other material obtained from corn, colored with natural dyes and that you can paste with water.
- - Paper for Christmas gifts and ribbon.
- - Wooden glass and bowl (they can be easily found among the tools for the crib or tile decoration)
- - Artificial snow
- - Extra strong glue for decoupage or patafix or hot glue gun
- - Scissors
- - Scotch tape
- - Ruler
Santa Claus home How-To
- - It isn't difficult to make Santa's house you can see above. You must be only patient. It is a creative game to do with your children.

The list of all you need is only indicative. Much depends on the size of your boxes and what you can recover without having to spend much. For example, instead of the bristol board corrugated paper you could use A4 sheets of white paper, doubled. To paste the materials you could choose strong glue for decoupage or even PVA glue, or the hot glue gun or some pieces of patafix. What you see in the picture is only part of the material I used. The box is not here for its size.
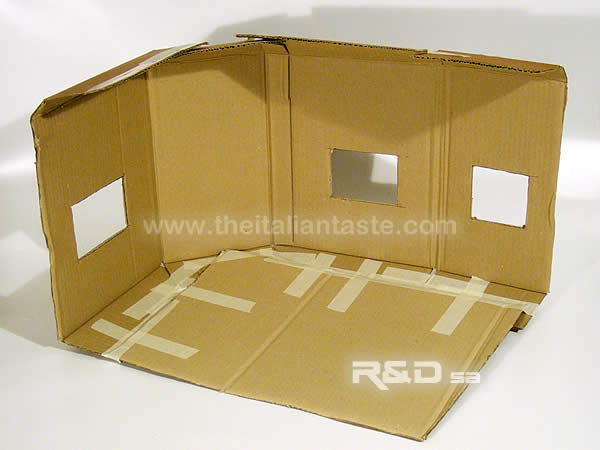
And now let's see how to proceed with the boxes.
Open one box fully in the direction of the longer side.
Fold the upper and lower flaps to make the roof and part of the floor.
To make the roof, fold also part of the longest side together with the flaps, on the contrary your house could be too high.
With a side of the second box complet the floor.
Join all the pieces with adhesive or paper tape as you can see on the photo.
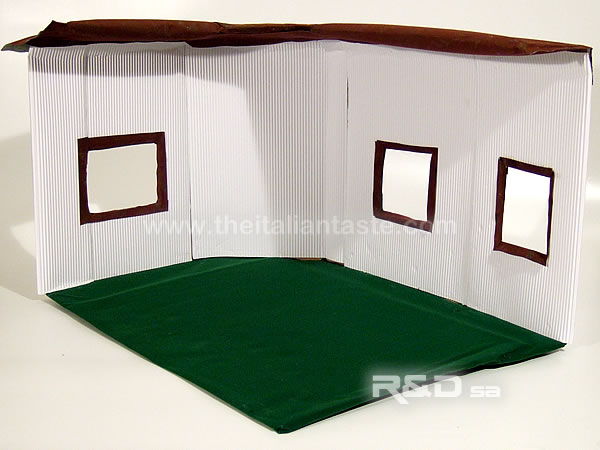
Line the floor with green sticky paper.
Cut out some squares or rectangles from the walls with the size of penguin and igloo images.
Line the walls on both sides gluing Bristol board corrugated paper.
Line the roof (above and below) with brown sticky paper. Complete with artificial snow here and there.
Cut out some strips of brown sticky paper to make picture frames.
Cut out the images of penguins and igloos and attach them outside using pieces of patafix. So you can remove and replace them with other images to "restructure" your house at the end of Christmas holidays.
- - Now you can make Santa's furniture.
- - Use HappyMais or another similar material. Your children will love to glue its pieces, mixing colors and thus obtaining the fireplace, firewood holder, table, chair, armchair with its footrest and chairs for gnomes (3).
- - Complete with the two little pine-trees decorated with polystyrene beads.
You'll get wood to put on firewood holder from the cinnamon stick. - - Tha last touch: wrapped gifts. I wrapped some pieces of polystyrene that I had or some bottle caps ... and then I garnished them with ribbons.
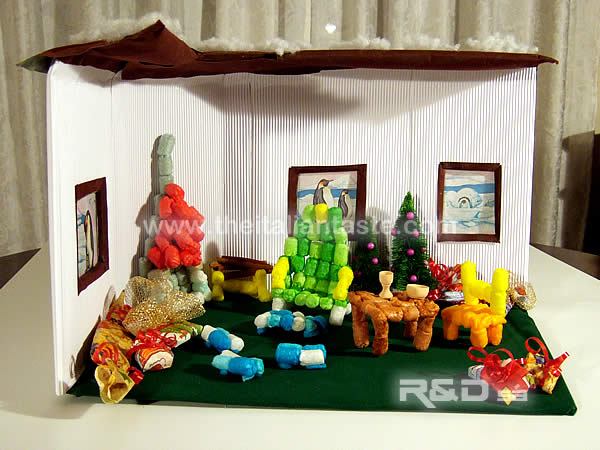
Here's Santa's house!
What about it?
You'll need a few hours to realize it. It could be the way to spend your evenings waiting for Santa Claus ...
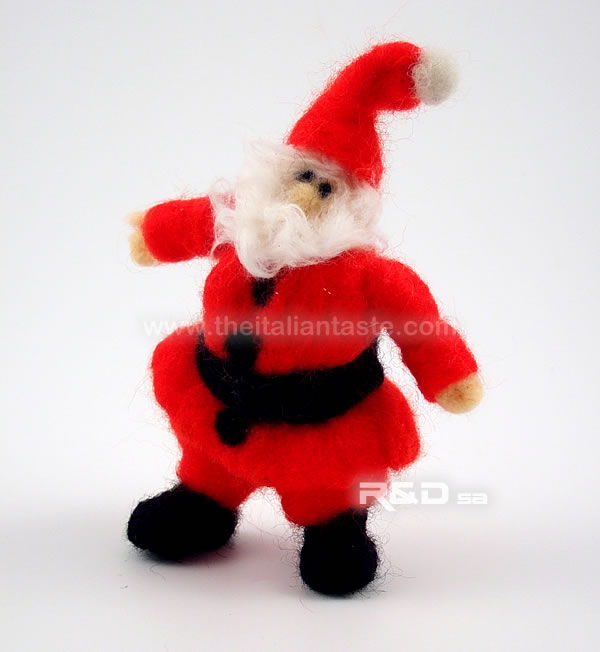
Now you need Santa Claus.
If you're able with needle felted wool you can make it in this way.Look at my Santa Claus made with this technique. I think it's very nice!
Rate this!