By: Loretta Sebastiani

Santa Claus balloon
A simple Christmas craft idea to do with your children: handmade balloon for Santa
Santa Claus balloon is a Holiday decoration that you can do with your kids waiting for Christmas day. You can hang it in their bedroom or in any corner of the house where they spend a lot of time. Another idea is to decorate the terrace of your house combining it with the Christmas tree dedicated to Santa Claus.

You'll need
- - large hollow polystyrene ball (25cm diameter)
- - LED Christmas lights (at least 40)
- - a gimlet to pierce the polystyrene or any other appropriate tool
- - Santa Claus images preferably in rice paper for decoupage
- - 3D pens in different colors
- - a small plastic box
- - self-adhesive blue paper
- - white foam rubber sheets
- - red felt cord, thin and thicker
- - decoupage glue
- - scissors
- - a little brush
- - a buffer pad
- - hot glue gun or super attak
Santa Claus balloon How-To
- - The first step is pasting Santa Claus images on your polystyrene ball.
I used decoupage rice paper from Renkalik.
Cut out the images following not exactly their contour.
Soak in water and squeeze your buffer pad very well, then moisten the back of your images gently.
Apply every image on the polystyrene ball and brush with decoupage glue uniformly.
Try to fill most of your ball as you can see in the photos.
Let your ball dry well.
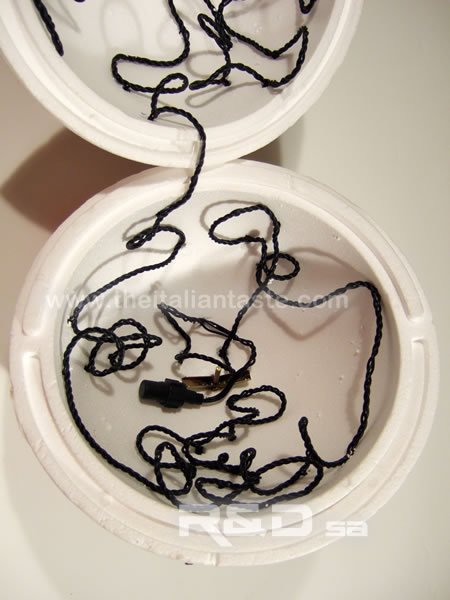
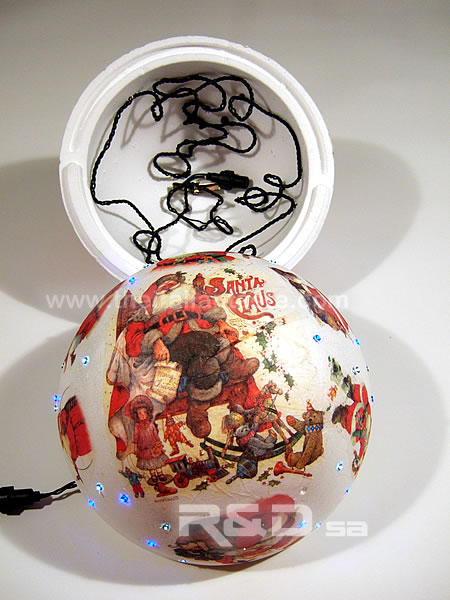
- - The second step is inserting LED lights into the ball.
Make small holes in the ball wall using the gimlet and avoiding to pierce Santa Claus images.
Proceed from the outside towards the inside.
Make as many holes as light number.
Enter any small light in its hole and wrapping at the same time the electric wire inside.
Bring out the wire from the ball where the two halves are joined by gently cutting the needed space.
Close the two halves after verifying that the lights work.
It should be enough to close with the pressure of your hands. On the contrary use hot glue or super attak. - - To complete the upper part of your balloon you can decorate Santa Claus images emphasizing some details with 3D pens.
Let all dry well.
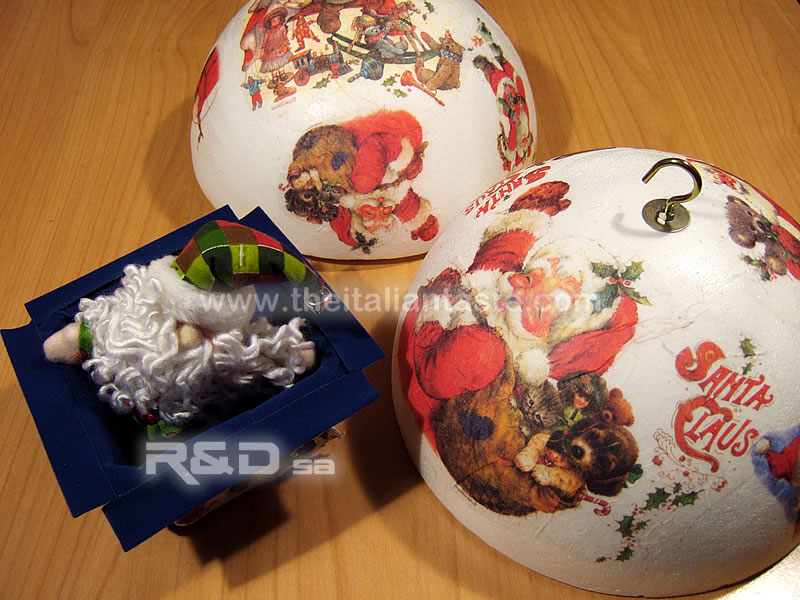
- - Now it's time to prepare the lower part of your balloon.
I used the plastic box containing mozzarella cherries (200g - 3 1/2 ounces).
Then I cut out 4 small pictures with Santa Claus, I glued them on white sponge rubber (Knorr Prandell product - but you can also use the white cardboard if you don't find it) and then I fixed them with a few drops of hot glue on the outer sides.
If you do not have the hot glue gun, you can safely use a super glue like Super Attak - - The last operation is to glue the thinner red cord at the junction point of the two halves of the ball and then the thick red cord around the ball and the lower part of your balloon. In this case too, you can choose between the hot glue gun or super attak.
You have to calculate the length of felt cord according to the point where you decide to hang your balloon.
I placed two small bells at the end of my cord as you can see in the photo.
To hang the balloon I used a hook in the ceiling. - - Place a Santa doll inside. Your balloon is ready!
For more details look at he photos.
Rate this!