The Advent calendar tells Santa's story
Here's a craft idea to make with your kids waiting for Christmas
Are your kids waiting for Santa Claus? but do they know what he does before leaving home to come and bring them the gifts? Read below ... carefully ... very carefully ;))
zoom »
You'll need
- For the panel and the plate
- - Canvas for painting, 40x50cm (16x20in)
- - Blue self-adhesive paper, velvet effect
- - 50cm (20in) white felt
- - Birch plywood (thickness: 0.8mm - 1/3 inch)
- For characters and house
- - Decoupage paper with Santa subjects
- - 4 white foam rubber (Knorr Prandell - 2mm thick) sheets
- - Miniature fence
- - Wood or cardboard reindeer shape
- - Wood or cardboard snowflake shape
- and then ...
- - Decoupage glue
- - Spray glue
- - Acrylic paints in the following colors: cream, orange, brown
- - Iridescent glitter powder
- - Snow paste
- - 3D glitter glue pens
- - Little pegs
- - A blackboard with chalk decorated for Christmas
- - Golden string
- - Colored pins
- - Thin paper
- - Scissors
- - Yardstick
- - Pencil
- - Brushes
- - UHU Patafix
- - Screw eyes (gimlets)
- - Transparent nylon thread

(91 download)
Advent Calendar story teller: this is the name I gave this special Advent calendar that helps you to count the days left before Christmas together wih your kids. Besides it tells them and their friends a story. To be precise, what happens in the month of December at Santa's home.
If you look only at the list of what you need you surely have concerns but keep in mind most of what you have to use for this fun and beautiful Advent Calendar may be used for other craft projects. In addition the last scene can accompany you for the entire week from Christmas to New Year.
But the essential point is another. To create a story with your children for being able to tell it to their friends too, with the fun and all tenderness that Christmas and Santa Claus can create.
And now ... at work!
Advent Calendar How-To
- - First day. Prepare the support and begin to treat the wooden shapes.
You have to buy enough felt to obtain a 50x60cm rectangle that you must fix, then, to the back of the canvas with white pins.
In this way, once finished Christmastime, you can remove it from the canvas and use it later for other jobs.
Then create the background.
Cut the blue sky (a 50x30cm rectangle) from the self-adhesive paper.
Shape the bottom edge as you can see in the picture.
Apply it on the felt at the top and secure it on the back using some blue pins this time.
Using the white felt cut the final part of the background that simulate a field of snow that you have to fit perfectly with the sky.
Fix it on the back too using white pins.
Glue the miniature fence in the position shown in the picture.
Paint the two wooden shapes with cream color and let them dry out until the next day. - - Second day. Complete the wooden reindeer and cut out the characters.
Finish coloring the reindeer shape.
Paint the body with brown except the reindeer's hooves and horns which instead should be colored with orange.
Let dry thoroughly until the next day.
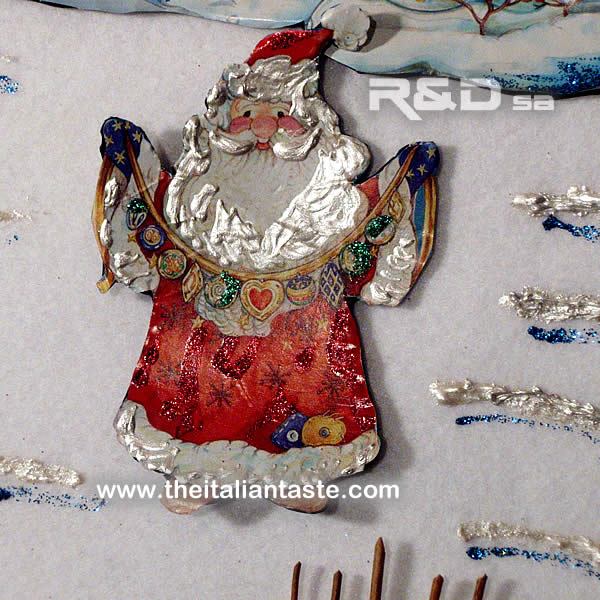
Cut out all the characters from the decoupage paper.
Then glue them on the foam rubber.
You should brush the glue on the back of the paper and then apply the figure on the rubber.
Lay the paper not to make bubbles.
Let dry thoroughly until the next day.
Draw the shape of a sled as simple as the one you see in the picture.
Cut out the sled from a rectangle of red self-adhesive paper or any piece of red paper that contains the slide and apply it perfectly on the foam rubber. - - Third day. Last details on the wooden shapes. Finishing touches on the characters and wooden shapes. Santa's story and plate.
First of all complete the wooden shapes.
Touch up the neck and the part below the tail of the reindeer with the orange color and let dry while you complete your work.
Trim the excess of the foam rubber. Touch up some details using 3D glitter glue pens.
Let all dry thoroughly until the next day.
Print the pages with the story.
Make the plate.
Cut out a 12x20cm rectangle from the birch plywood.
Make two small holes in the top corners and pass the golden cord.
Attach the two ends on the back of the canvas.
You could fix the two ends of the cord with screw eyes.
Cut out the the various steps of the story with the same size of the plate.
If you want you could spray the glue on some figures and then sprinkle iridescent glitter powder. Let dry well. - - Fourth day. Begin to assemble the Advent Calendar.
Glue the permanent characters, in other words those that will never be moved.
The home of Santa and the two wooden shapes. Look at the photos for more details.
Dot the sky for the snow effect with the 3D glitter glue pens.
Touch up other details according to your taste.
Wait until the color dries.
Hang the Advent calendar to the wall with a nail.
Screw two gimlets on the top edge and link them with a long piece of a nylon thread. Place above the blackboard.
Hang the first scene on the plate using some little pegs.
Fix all the other characters with little pieces of patafix.
In this way you'll be able to detach some of them and fix others easily.
You're ready, the story of Santa told by Fairy Elle is going to begin!
December 8 There, at the North Pole, |
 |
December 13 There's incoming mail! |
 |
|
December 20 Santa's little helpers |
 |
December 23 The sacks are almost full. |
 |
|
December 24 It's the great day! |
 |
December 25 Santa Claus is back! |
 |
Tips for saving
- - These are only tips, of course. You can simplify things and above all reduce costs by not emphasizing the details with the 3D glitter pens or using another support that you have already at home or a simple sheet of paper. Besides the shapes of the various characters, once cut, can be glued on simple cards.
- - Another tip: why do you not invite your children to draw themselves Santa's home and the characters? it will be exciting for them to bring into play their creativity.
Rate this!
Rating: 5 / vote cast: 1
Author: Loretta Sebastiani
Twitter | Facebook | Pinterest