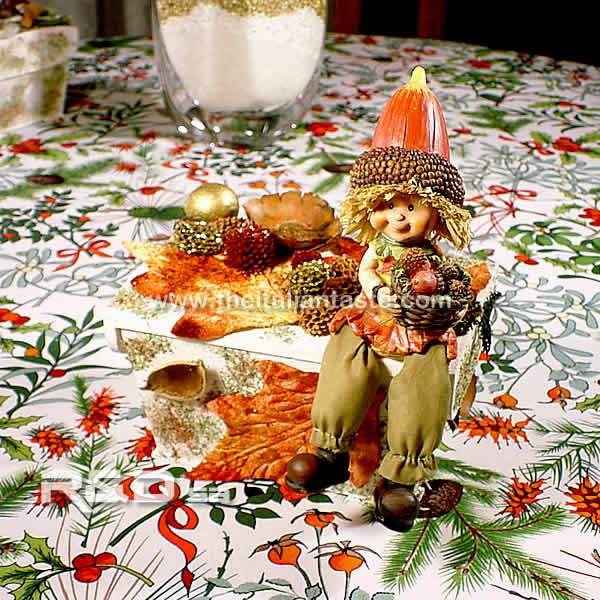
Decorated elf boxes
Let's make gift boxes, decorated with people and fruits of the forest
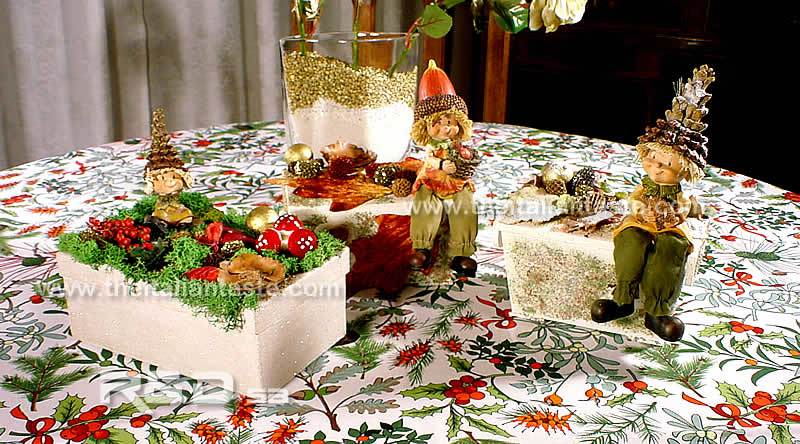
You can make these boxes to hide a gift for a child or only as a gift (it's enough to tell him the elf box must be his secret box!). But I'm sure that even an adult can receive such a gift with a smile (fill it with toffees and chocolate cakes! that's cool!).
 zoom »
You will need
- - Wooden boxes
- - White acrylic paint (I used Rayher: Bastelfarbe - Brico Color)
- - Rayher DecorArt Glitzersand (Sandstone - 620 Brillant Gold)
- - Gnomes, sprites, elves, goblins ... choose the most interesting or nice according to you!
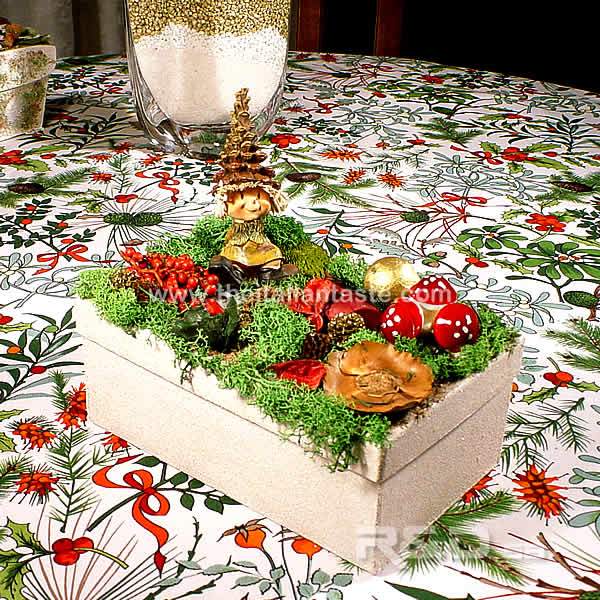
- - Artificial red or green ground
- - Natural moss
- - Fruits of the forest: little acorns and walnuts, golden berries, pieces of coloured wood, little mushrooms, velvet or silk leaves ...
- - 3D glue for foils (Rayher product)
- - Artificial snow
- - Different brushes
- - Cutter
- - Scissors

(24 download)
If you want to line the interior part of your box, you also need rice paper towels and its specific glue. But you must be very patient to make it. I suggest you to paint the inside with an acrylic colour (in this case green or white) if you have no much time.
 zoom »
Ideas to decorate wooden boxes to give to children at Christmas or for their birthday
 zoom »
- - It is not difficult to make this box but you must be patient beacause you need some time.
- - At first you have to paint the exterior and the interior (if you want to line it) parts with the acrylic white colour.
Let dry your box very well.
If you choose to color the inside too, paint the interior part with the chosen acrylic colour. - - Then brush the other acrylic colour (Sandstone - 620 Brillant Gold).
It has a brilliant effect. If you don't find it, brush the white acrylic colour again.
Let it dry very well. - - At this point, if you want, you can decorate the interior part with the rice paper.
Start with the bottom of the box and then continue with its sides, one at a time.
Torn all the subjects you have chosen from rice paper with your hands and then apply them directly on the inside of the box brushing the glue directly on the surface and avoiding the formation of any pleat.
Let all dry very well.
 zoom »
- - Decorate the outside with what you have chosen and follow your fancy.
Look at my boxes for more details.
Every piece can be fixed on the surface with the 3D glue for foils.
Begin with the figure of the wood you've chosen and go on with the other materials.
If you want, you can sprinkle some artificial snow too. - - Look at the photos for more details!
Rate this!
Rating: 5 / vote cast: 1
Author: Loretta Sebastiani
Twitter | Facebook | Pinterest